We had to completely redesign the platform deck because the original F1TENTH platform was made for the Traxxas Fiesta ST Rally VXL but we’re using a Traxxas Slash 4x4 VXL. Turns out the original deck was too small and the holes didn’t line up at all.
The original F1TENTH uses a Traxxas Fiesta ST Rally VXL Edition 1/10 Scale Brushless Pro 4WD, but we found the Slash 4x4 VXL cheaper on eBay and more available used. Problem was, the platform deck just didn’t fit properly.
What was wrong with the original platform
The deck was too small for the Slash chassis. The original platform was sized for the Fiesta ST, so it didn’t have enough surface area for the Slash.
Plus the mounting holes didn’t align with the chassis screw holes at all. The hole pattern was completely different between the two chassis types, so there was no way to mount it properly.
So we decided to design our own platform from scratch.
Original vs Custom Platform Comparison
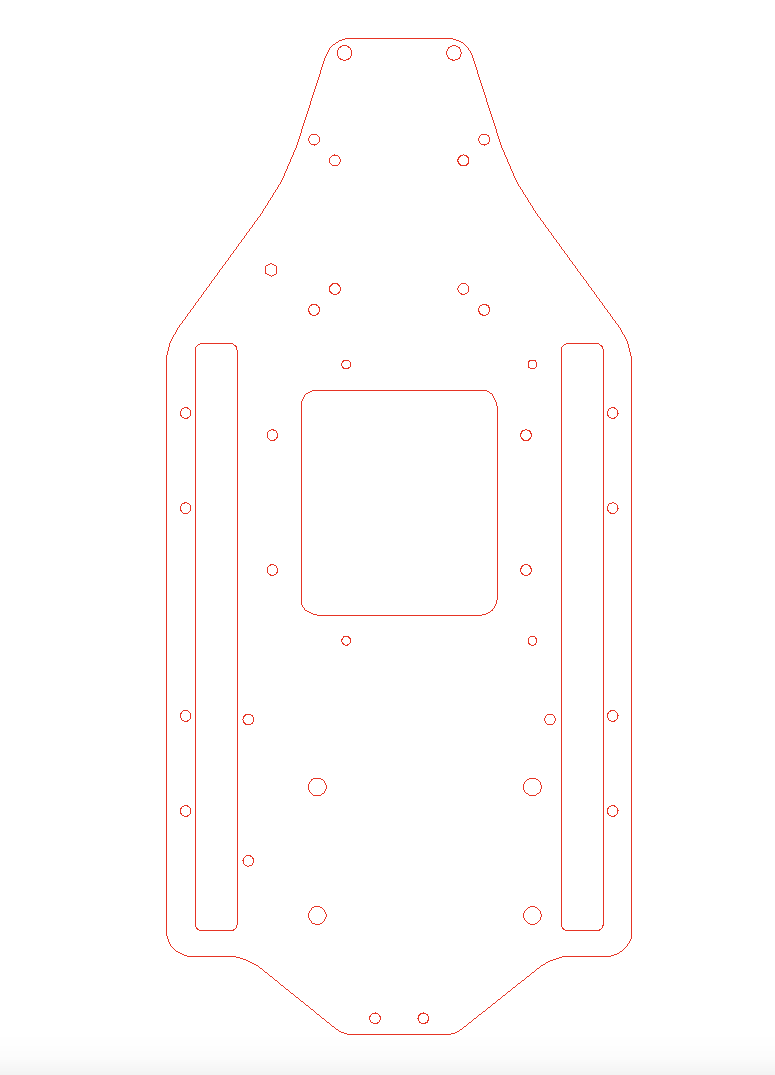 Original F1TENTH platform sized for Traxxas Fiesta ST
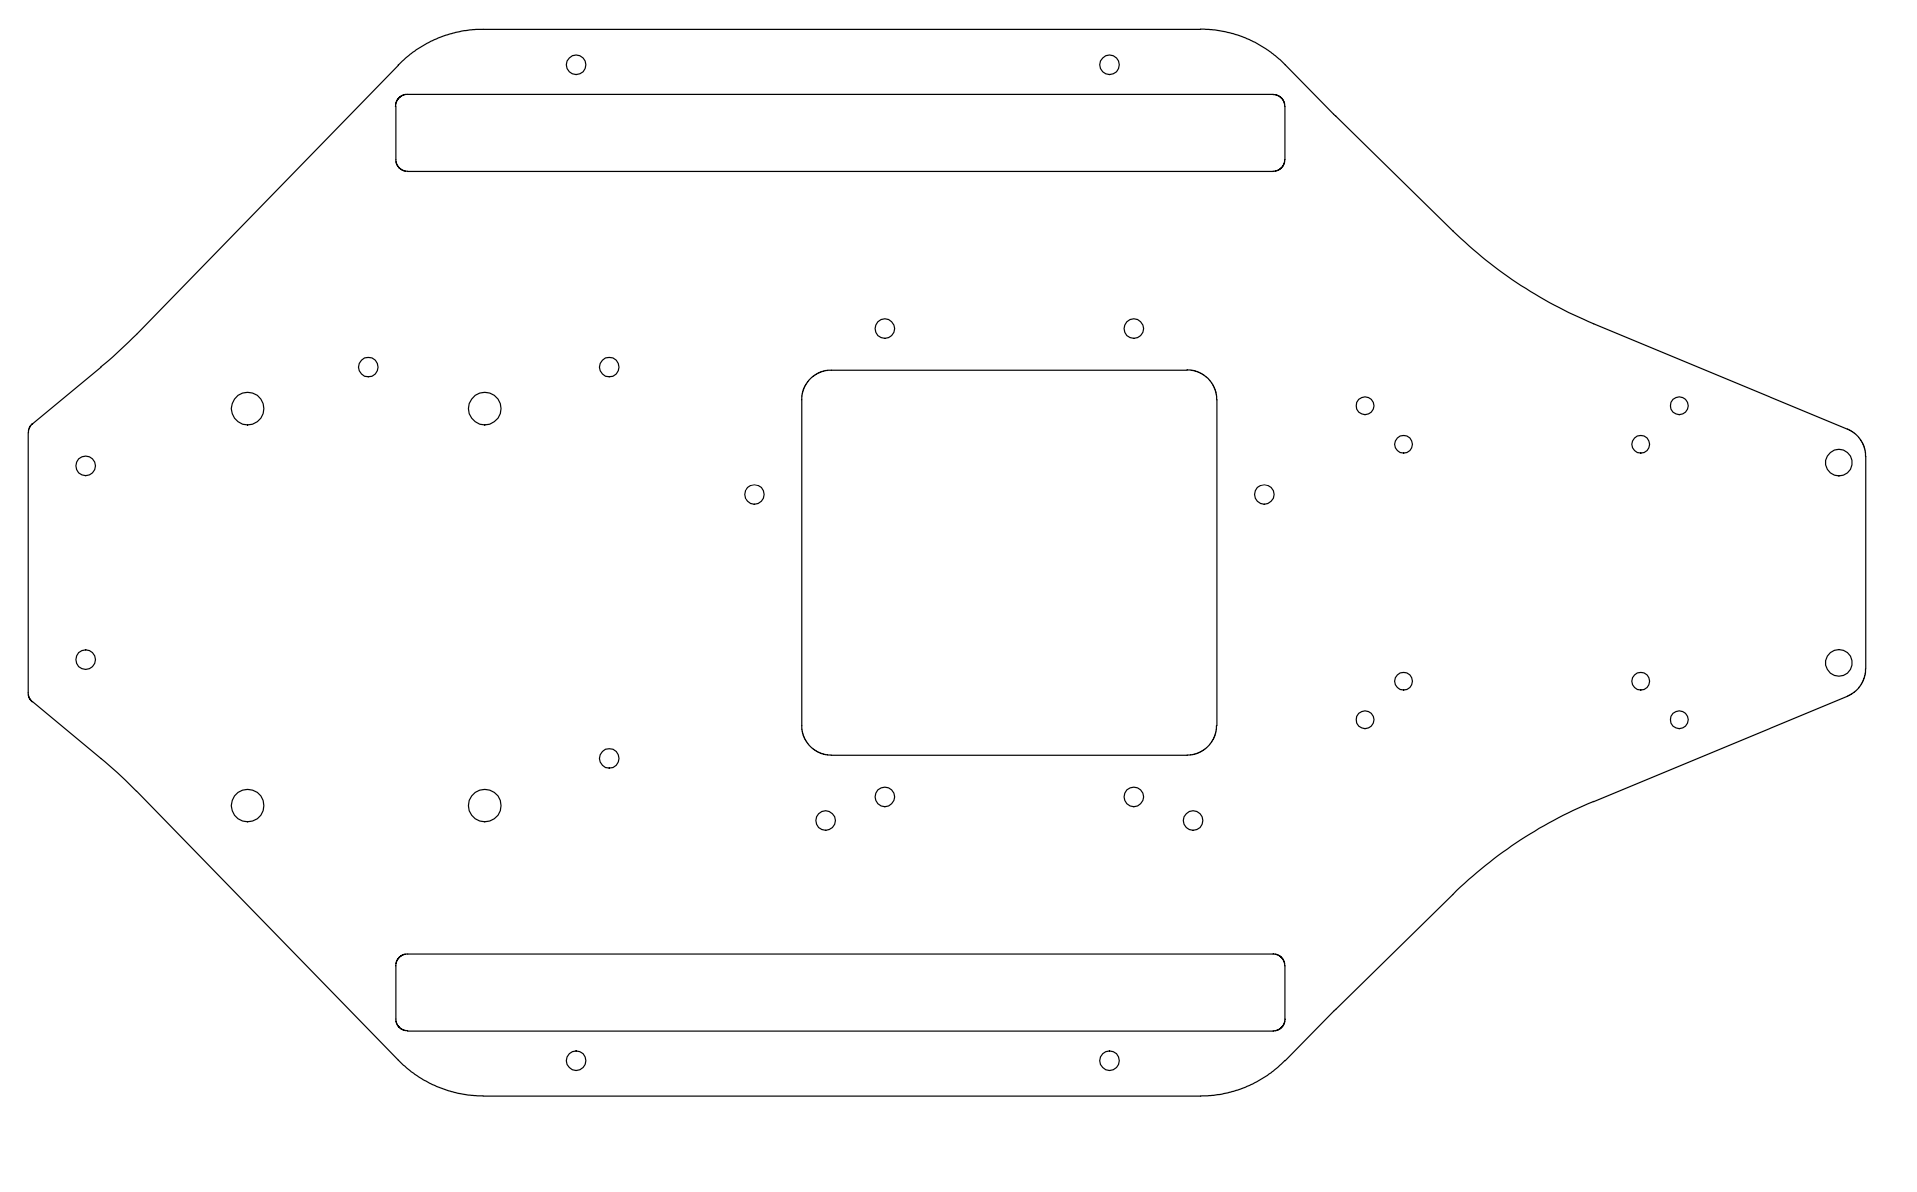 Our custom platform designed for Traxxas Slash 4x4 VXL
Our platform design
We made it out of 6mm thick acrylic. Tried thinner stuff first but it was too flexible. 6mm gives you enough rigidity without being too heavy or expensive.
The platform is designed specifically for the NVIDIA-Jetson-Orin-Nano with proper mounting holes and spacing. If you’re using a different Jetson model, you can modify the design files or just drill your own holes.
Hard lesson learned: use metal standoffs
This one we learned the hard way. Initially used plastic standoffs because they were cheaper. Big mistake.
The car crashed at high speed during testing and ALL the plastic standoffs just shattered. The entire platform came off and damaged components. Lesson learned: always use metal standoffs for anything structural. The cost difference is minimal compared to replacing broken parts.
Design files
I’ve provided both SolidWorks (.sldprt) and DXF files so you can either modify the design or send it directly to a laser cutting service. Most local makerspaces can cut this for pretty cheap.
If you want to use a different Jetson model, just open the SolidWorks file and change the mounting hole pattern. Or you can jusrt drill holes by marking the mounting holes of your jetson.
Manufacturing
We got ours laser cut locally by using our university’s laser cutter in GRID. Most makerspaces or fab shops can do this. The DXF file works directly with most laser cutters.
You could probably CNC machine it too if you want threaded holes, but laser cutting is cheaper and faster.
Assembly notes
Mount the metal standoffs to the chassis first, then place the platform. Make sure everything aligns before tightening. Install the Jetson first, then add other components working outward.
Check that nothing interferes with the chassis movement or wheels. Leave room for cables.
Future improvements
For version 2, I’m thinking about adding built-in cable channels so all wires flow through neatly.
The design files are available so anyone can modify them for their specific needs.